


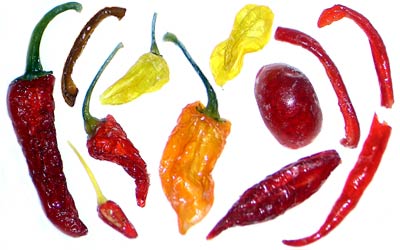
Sweet heat roll call:
Serrano, Jalapeno (strip, green), Caribbean Red, Thai Hot, Fatalii (yellow), Orange Habanero, Cherry Bomb, Hot Paper Lantern, Jalapeno (strips, red), Chile De Arbol
Harald Zoschke’s excellent article on candied chiles is another great way for preserving your little garden hotties and it makes them sweet to boot. Here’s the process he wrote up for us in Candied Capsicums. You can also check his original story for recipe inspiration and additional tips.
Be warned, though – candying chiles is not for the impatient. The process spreads over six days, taking about 30 minutes every day, not counting cleanup of sticky utensils and pots. While the sophisticated approach of French confectioners aims for soft fruit, we’re aiming for crunchy chiles with a transparent, almost glass-like appearance, so we can take a simpler approach. Let’s get started!
Required Equipment
Medium sized saucepan
Wooden spoon
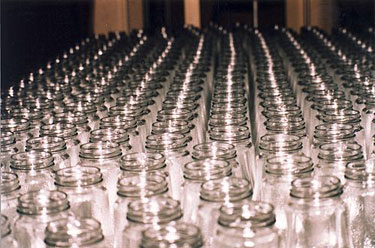
Mason Jar (1 quart/1 liter) or similar glass container with lid
Small glass bowl that just fits into the opening of the jar, to hold down the
peppers in the liquid
one or two clean marmalade jars, lids
Heat resistant strainer
1/2 quart (1/2 liter) jars (for example jam jars) to keep excess syrup
Cookie cooling rack
Baking oven or electric dehydrator
Old newspapers to put under pots and jars
Ingredients
About 1/2 to 3/4 lb. (250 to 340 grams) of fresh chile pods,
rinsed and cut in half or strips (see note below)
2.6 lbs.(1,2 kilograms) regular white sugar
1 Quart (1 liter) water
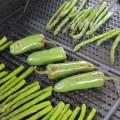
1. Preparing the Peppers
Like with all preserving techniques, only the freshest, spotless chiles should be used. These are rinsed and patted dry. To ease syrup penetration, it is recommended to cut the pods in half. You should also deseed them. Just cutting the pods in half works well for thin-walled varieties like Habanero, Cayenne or Thai. Fleshier chiles like Jalapeño are better cut into strips.
2. Cooking the Syrup
In a large saucepan, combine 1 quart (1 liter) water and 2 lbs (1 kilogram) sugar. Using the wooden spoon, mix well, then bring to a rolling boil. Keep boiling and stirring until the mixture takes on a syrupy consistency, but still stays clear and colorless. This takes about 30 Minutes. If you are using a ceramics stovetop, watch out not to spill any sugar or sirup on it, as this stuff burns in fast.
Put the cut chiles into the Mason jar or other glass container, pour with boiling-hot syrup (caution – don’t burn yourself). Leave enough room to put a small bowl as a weight on top to keep the peppers down, all covered with in the liquid. Close the container, keep remaining syrup in marmalade jar(s).
Day #2
Drain chiles in a strainer, letting the syrup flow into your saucepan. Put chiles back into the glass container. Bring the syrup to a boil and stir in an additional 50 g (1.75 oz.) of sugar. Add also the syrup you saved in marmalade jars, keep boiling and stirring with your wooden spoon for about 10 minutes at high heat. Pour the hot syrup over the chiles again, put on the weight to keep them all covered in liquid. Also, save the remaining syrup again, let chiles sit in their closed container for another 24 hours.
Day #3 to Day #5
Repeat the second day’s procedure, including the addition of 50 g (1.75 oz.) more sugar every day. Both the sugar addition and the reduction by cooking will cause the syrup to become thicker and thicker. And it’s getting hotter, too, as some of the capsaicin dissolves from the peppers into the liquid. After Day #5, let sit for 48 hours and have a rest on Day #6.
Day #7
Pour syrup and chilis into saucepan and bring to a brief boil, for just one minute, then take off the heat. Drain chiles through strainer, catch the syrup in jars. Arrange the chiles on a cookie cooling grid or a grid from your baking oven. Be sure to put parchment paper or a newspaper underneath, as we put the peppers there to let them drip off excess syrup. Count for two hours.
As the pieces will still be sticky, we finish them off in the baking oven or dehydrator. Since I kept my good old trusty El Cheapo “Mr. Coffee” dehydrator from our time living in Florida, I used that one, and the chiles were nice and dry after just four hours. When using a baking oven, dying should take about 15 minutes at 210F (100°C) to 300F (150°C) with a door lightly open. If available, turn on the ovens’s air, too. Check after 10 minutes, drying should be finished no later than another 10-15 minutes. (To keep the peppers as they are, we prefer the airflow and lower temperature offered by a dehydrator, which is a great device for drying peppers in general). Either way you should let the chiles cool to room temperature, then store them in an airtight container. Flat containers like Tupperware or Gladware allow to place the pieces side by side, rather than stacking them, and potentially have them stick together.
Latest posts by Mark Masker (see all)
- 2024 Scovie Awards Call for Entries - 07/07/2023
- 2024 Scovie Awards Early Bird Special: 3 Days Left - 06/29/2023
- 2024 Scovie Awards Early Bird Deadline Looms - 06/25/2023